
Pressure canning POTATOES!
- Jamie Musgrove
- Jun 26, 2022
- 6 min read
Hey y'all! It's been a hot minute since I've created a blog post or a new video, so I decided it was time for both! Food preservation has been on my mind a good bit lately, and I've been thinking of things I wanted to stock in my pantry. I knew for sure that potatoes would be on my list, so that's where I started! Skip down to the TUTORIAL VIDEO* to get started if you're not much of a reader!

Ahhhhhh, the humble potato. What's not to love about this versatile vegetable? In my opinion, it's right up there with the banana when we're talking about the perfect natural food. Think about it; they are portable and come in their own wrapper. You can boil them, FRY them(my fav!), bake them & sauté them. You can mash them, slice them, cube them, chunk them up, or leave them whole. They are great with beef, poultry, pork and lamb. They can be the star of the meal, a charming side dish, or a filler-food when the budget is tight! Their mild flavor allows them to be a perfect partner with tons of other vegetables. And as far as I know, the potato loves all dairy items; milk, cream, butter, sour cream, and CHEESE!! I could ramble on and on about this fabulous vegetable, but I think you understand what I'm saying, and WHY the potato is loved by so many! Oh---I failed to mention that they are pretty inexpensive so that in itself is reason enough for it to be a popular food item!
Potatoes are also available in tons of different varieties. My favorites include the White, the Yukon Gold, Red-Skinned, and the Russet. Each variety fills a niche in the cooking world. For potato salad I like to use a combination of Yukon Gold & Russet. For mashed potatoes, I tend to like White potatoes. Nothing bakes up better than a Russet, and when it comes to roasting potatoes, give me a Red-Skinned one! I suppose the most popular way to eat a potato is as a FRENCH FRY! And I agree! I love French Fries with a passion! I also adore a Tater Tot and a potato chip! I swear, this blog post could go on and on...


So, lets talk about preserving potatoes. My favorite way is to pressure can them so I can keep them in my pantry to use when needed. Pressure canning is such a great way to process low-acid foods like potatoes for shelf stability. I'm no fan of store-bought canned potatoes. I think they taste terrible and their texture is dreadful. Home-canned potatoes, on the other hand, are AWESOME!! I'm happy to share with you the cold-pack method I use, as well as the video tutorial posted further below that shows you step by step how to preserve potatoes using a pressure canner.
What you'll need:
a pressure canner
white potatoes
kosher, canning, or pickling salt
water
jars, lids and rings
Let's begin:
For a large pressure canner like my 23 quart Presto, I've found that 10 lbs of potatoes fits perfectly into 14 pint wide-mouth sized jars. That's exactly enough jars to fill the canner to capacity. Your canner might be a different size so use what you have but expect different quantity limits if you use a smaller canner. If I am using quarts, I can only fit 7 jars.
White potatoes have a low to medium starch content and are perfect for canning. It's the variety I use when I pressure can potatoes.
Thoroughly wash and peel 10 pounds of White potatoes. Peeling is necessary because unwanted microbes can live in the potato skin which in turn could make you sick. So peel them for sure!
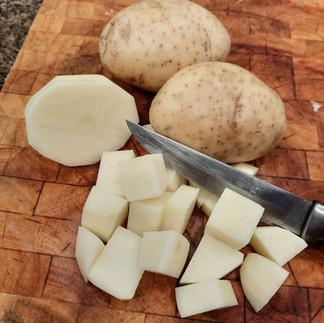
Dice the peeled potatoes into small chunks of rather uniform size. They don't have to be perfect, but you do want small chunks that will loosely pack into the jars well. I soak mine in water to which I have added a few teaspoons of Fruit Fresh. This keeps the taters from turning brown!
Thoroughly wash your jars, then line them up on your kitchen counter. I always lay down a tea towel and line my jars up.
Next, I put my pressure canner on the stove and add in 3 quarts of COLD water. I'm using the COLD PACK method, so everything starts out cold including jars, water, and potatoes! Make sure to place the jar rack/platform in the bottom of the canner. This helps keep the jars from cracking during the cooking process.
Using you hands or a big spoon, fill each jar with your potato chunks, leaving an inch of space between the level of the potato and the rim of the jar. The space you're leaving is called "head space" and it's very necessary to leave enough head space to allow for steam to escape during the cooking process.
When all the jars are full, add 1/2 tsp of Kosher salt( or canning or pickling salt) to each jar. Then pour water over the potatoes, leaving the 1 inch of head space. The potatoes will more or less be covered, but you still have the inch of room left in the jar. Pour off some of the water if you question the amount of space you have left in each jar.
Clean the rims of the jars with a wet paper towel, making sure no salt crystals are visible. It could inhibit the sealing of the jar if the rims aren't clean.
Next, lay a metal lid on top of each jar. Now grab a ring and place it on top and turn until the threads catch. Twist the ring just until you feel resistance. Then turn just barely past that point. You don't want to tighten down the lid too much. You just want it tight enough to be securely in place but at a point where steam can still escape from the jar during cooking. Do this to each jar.
Line up your jars in the canner. I can fit 7 wide-mouth pint jars on the bottom. Then I add the metal separator, and add the next level of jars on top. My 23 quart presto canner will hold 14 pints.
When the canner is full of jars, put the lid on, making sure the sealing gasket is securely in place, and turn the lid until it catches and you can turn it no further.
Turn the stove on medium high to high and let the water come to a boil. When you notice a steady stream of steam escaping from the exhaust port on top of the canner, set a timer for 10 minutes. This is called flushing the canner. It is an important step so DO NOT skip it.
When your 10 minutes are over, place your toggle weight onto the vent port. I generally turn my heat down a bit at this point. Watch the pressure gauge until it reads 11 on the dial. By the time it hits 11, the vent toggle will be "dancing" in a rocking back and forth motion.
Set your timer for 35 minutes for pints, or 40 minutes for quarts and let the potatoes "cook" until the timer goes off.
When the time is up, turn off the heat and move the canner off the hot burner. Allow the heat to dissipate naturally. It generally takes 30 minutes for the pressure to drop down to zero. DO NOT ATTEMPT TO OPEN THE CANNER IF THE PRESSURE GAUGE STILL READS ABOVE ZERO! It's dangerous, so just be patient and wait.
When the gauge is at zero, it's safe to remove the toggle, and twist open the lid. It will be very hot inside the canner so lift the lid away from your body/face. Otherwise you will get a face full of hot steam and could easily be burned.
Using a jar gripper, grasp each jar and remove it from the canner and set each jar on the kitchen counter lined with a towel. Allow the jars to completely cool down. I let mine sit over night.
Test each lid by pressing down on each one with your finger. If it pops up and down when you press, the jar hasn't sealed and therefore the potatoes won't be shelf stable. However, if you press down and the lid is solid to the touch, the potatoes are good to go! You can label them with a marker and place them in your pantry until needed. Shelf life for a jar of potatoes is unknown to me---we eat them before they are even a year old. If properly done, they should be shelf stable for years.
Congratulations! You just canned potatoes with your pressure canner! Well done!

See how nice they turned out? To serve them, simply open up a jar and warm it up in a pan with some milk and butter. I love them served that way! Or you could open a jar, drain off the liquid, and mash them! Then add a bit of butter, cream, and salt & pepper and you'll have some GREAT mashed potatoes! Technically speaking, you could use these potato chunks in potato salad, but for me they are a bit too soft and do not hold together well enough. But to each his own, right?
I hope you've enjoyed learning about the canning process for potatoes. I urge you to investigate other methods of food preservation, too! The more you know, the better off you'll be!
Be sure to SUBSCRIBE to my YouTube Channel so you never miss a new video!
Tutorial Video*:
Thanks so much for stopping by. I invite you to take a look around at my other blog entries--you might find something fabulous. Please subscribe to my blog, too--it's free! Leave a comment or a suggestion--I really love hearing from you! Jamie ♥
Be sure to visit me on Facebook at https://www.facebook.com/jamieteachmetocook/